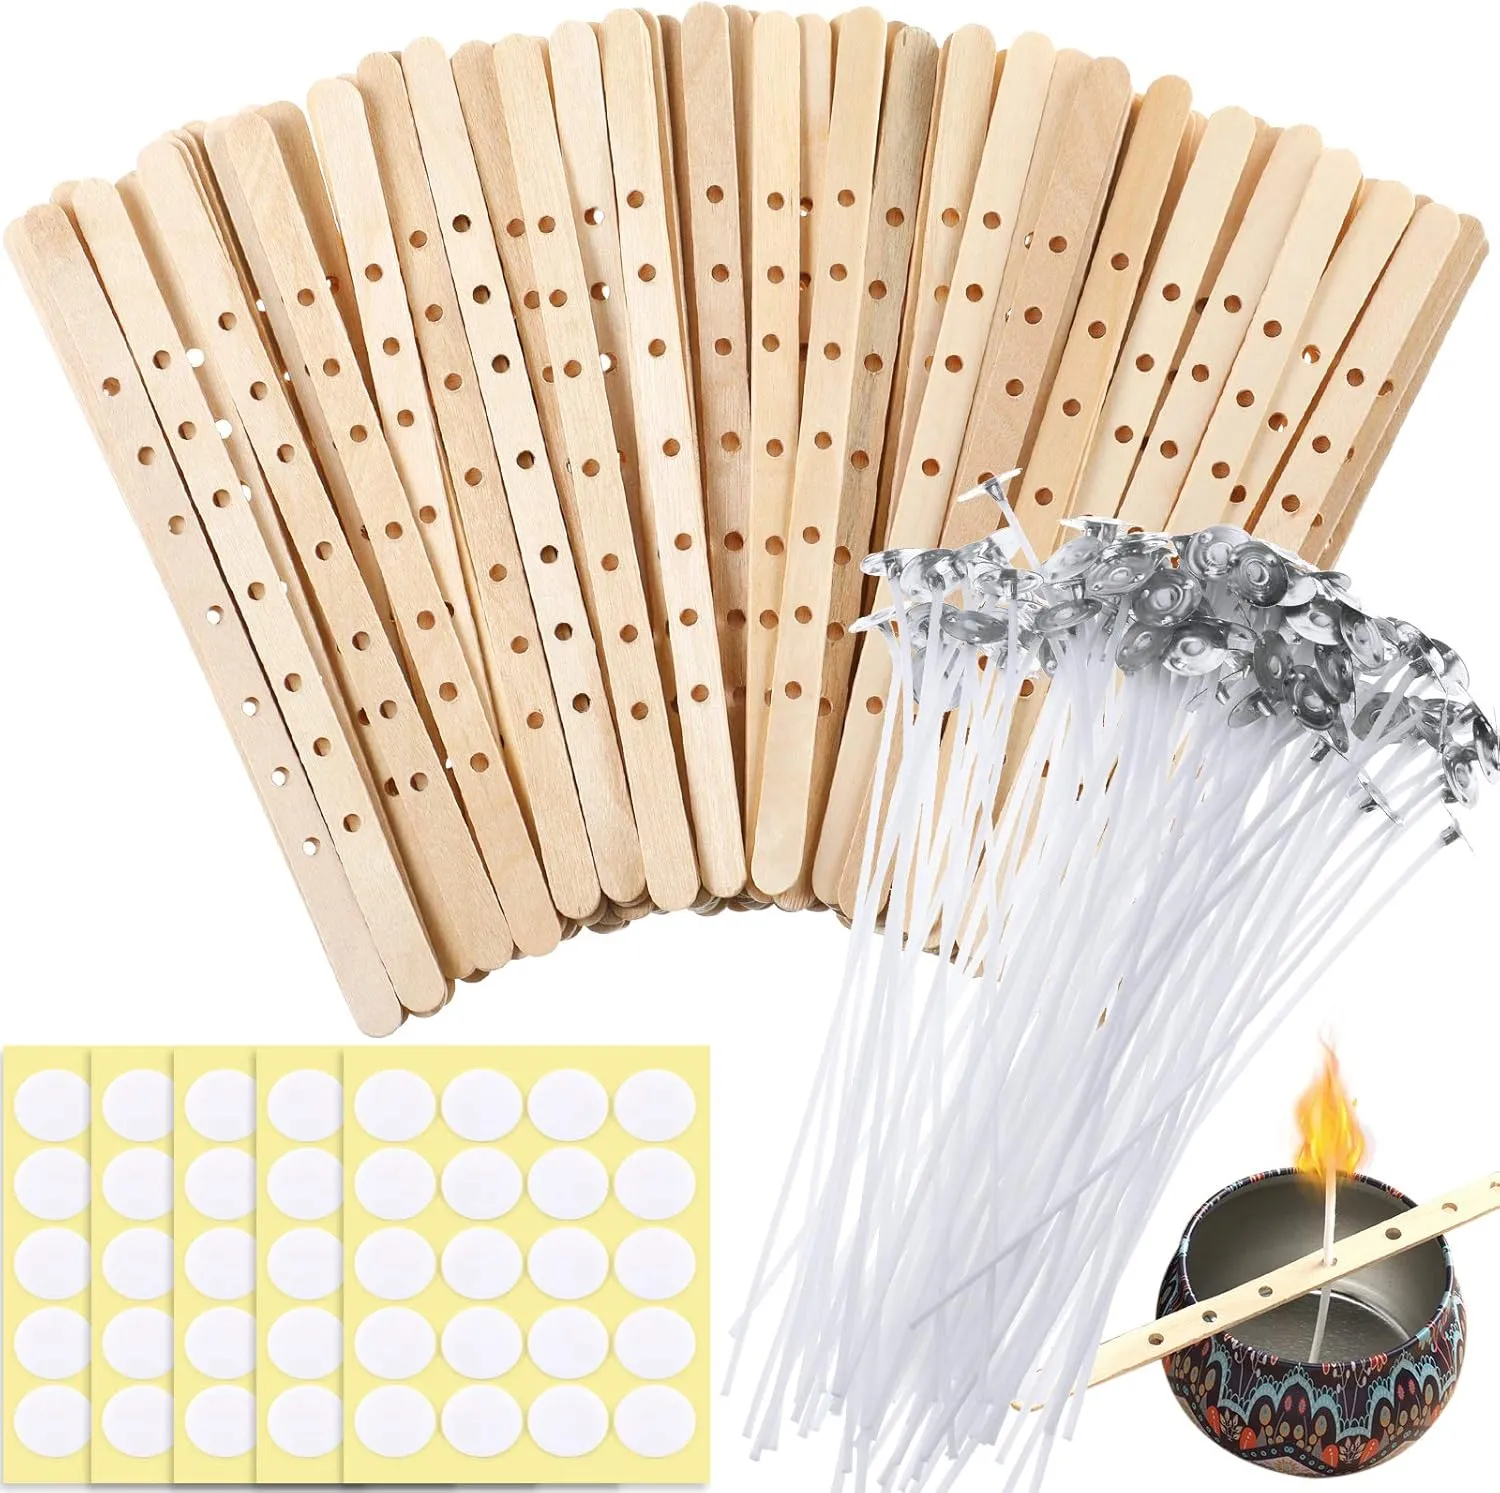
- Nice combination: you will get 50 pieces wooden candle wick holders,100 pieces 6 inch candle wicks and 100 pieces candle wick stickers in our package, the sufficient quantity will meet your various needs for making homemade candles
- Quality material: these candle wicks centering devices are made of quality wood to ensure long-term use; Candle wicks are coated with natural wax and candle wick stickers adopted double sided form and heat resistance glue, which can keep your wicks in place
- Proper size: candle wick approx. 6 inch/ 15 cm in length, base diameter is approx. 0.79 inch/ 2 cm, wick stickers's diameter is approx. 0.79 inch/ 2 cm, thickness is 0.08 inch/ 2 mm; The appropriate size could be sufficient for holding the wick base; Wick holder is approx. 7.09 inch/ 18 cm in diameter, 0.35 inch/ 0.9 cm in width, hole diameter is approx. 0.15 inch/ 0.4 cm; Suitable for making large candles
- Simple to use: just place candle wick stickers on the bottom of the wick and adhere your wick to the bottom of the jar, then pour the wax and let the wax sit five minutes to harden; Lay our wooden candle wick holders through the top of the container, place the wick in between so that it stays centered while the wax hardens; Ideal for centering and holding most types of wicks and large quantity wicks straight in the container
- DIY homemade candle: the candle making stickers, candle wick, and wick clips for candles are necessary for anyone new to the candle making craft, which makes the candle production easier and suitable for home candle-making; There are many ways to use your candles, so get a lot of fun and convenience during the DIY making process
Features:
Candle making guide:
Step 1: measure the wax
Before you begin the candle-making process, make sure you have a clean, flat surface to work on. You can also protect the area with towels. Move anything that you don't want to get wax on. Measure out how much wax you would need to fill your container.
Step 2: melt the wax
Pour the wax into your double boiler and allow to melt for 10 to 15 minutes, stirring frequently.
Step 3: add fragrance oils
When your candle wax is melted, it's time to add fragrance oils. Follow the instructions on your wax package for how much to add. Simply pour it into your melted wax and stir for a few seconds.
Step 4: attach the wick and pour the wax
Place candle wick stickers on the bottom of the wick and adhere your wick to the bottom of the jar, then pour the wax and let the wax sit five minutes to harden. Tips: before you pour the wax into your container, let it cool for a few minutes.
Step 5: secure the wick
To prevent your wick from swaying in the melt wax, you need to secure it in place. Lay our wooden candle wick holders through the top of the container. Place the wick in between so that it stays centered while the wax hardens.
Step 6: add more wax
If your candle hardened with an unsightly top, simply reheat and add your remaining wax.
Step 7: trim the wick
Your candle wick should be less than half an inch long. If, when lit, the candle flickers or has a tall flame, trim the wick.
Specifications:
Size: as picture shows
Material: quality wood, double sided form and heat resistance glue
Color: as picture shows
Package includes:
50 x Wooden candle wick holders
100 x Candle wick
100 x Candle wick stickers
Note:
Please allow slight error on size due to manual measurement.


 Money Club High Launch 520cc 12.5° Golf Driver. Right Handed Premium Ultra Forgiving Senior Lite Flex Graphite Shaft with Tour Velvet Grip")


, 24GB 256GB, 6.6\" FHD Cell Phones, Triple 64MP Camera, Dual 5G SIM Android 13 Phone Unlocked, 18W OTG/136dB Loudest Speaker, NFC/GPS/T-Mobile")

")

